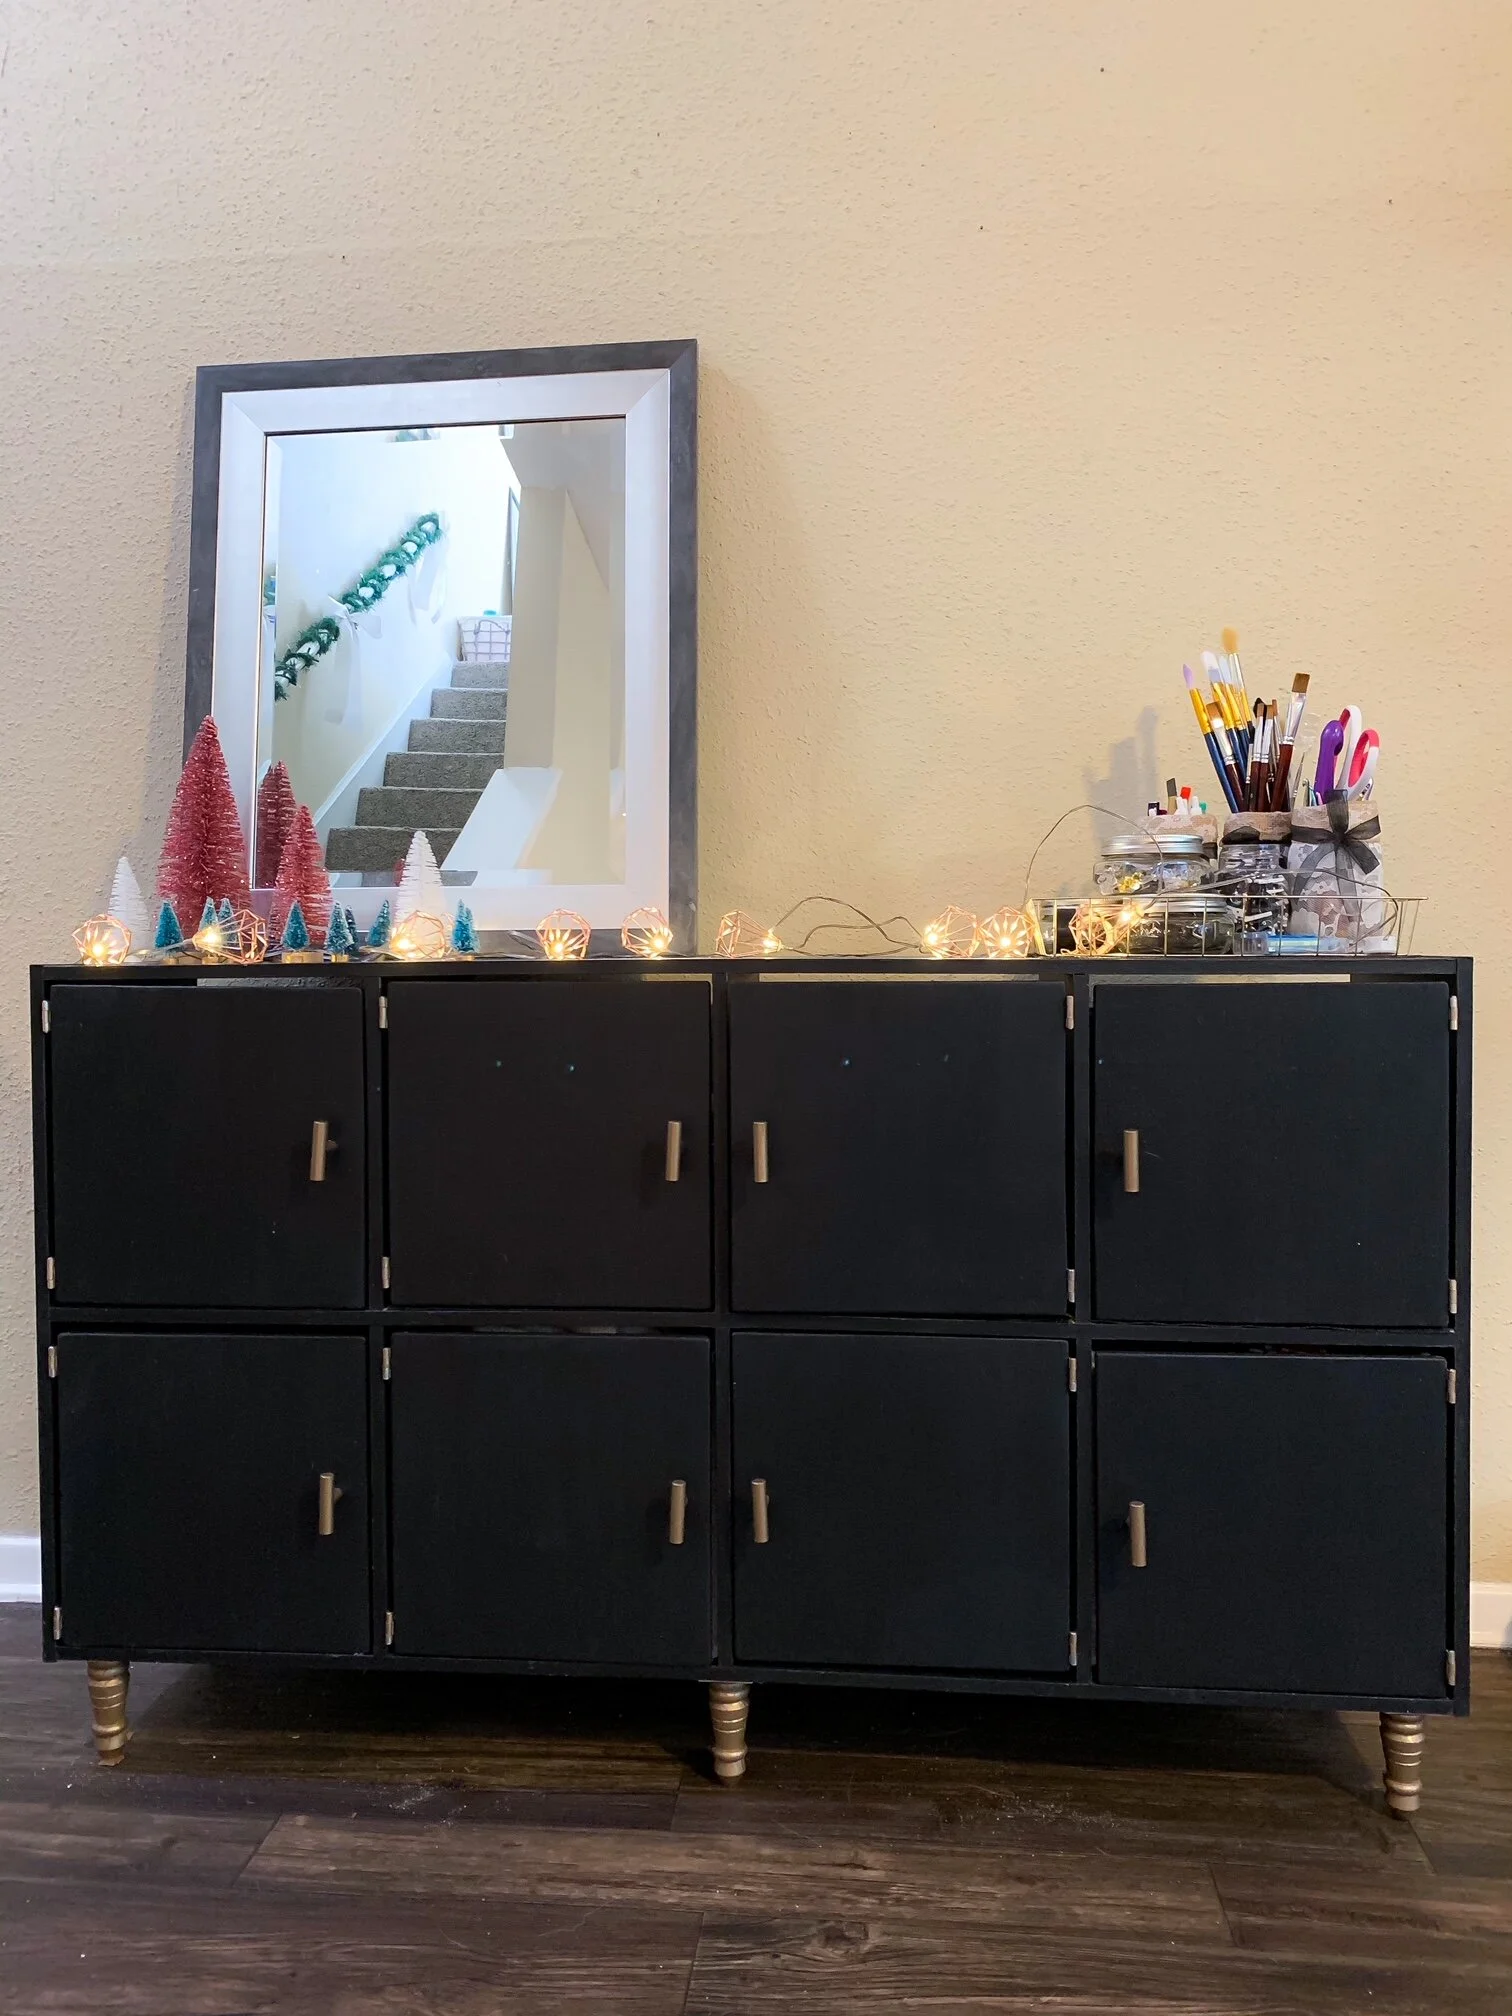
Cringey Cubby to Chic Cabinet
This was one of my most favorite projects to date. Let me tell you, this was quite a large flip that took a while to complete due to the amount of building that was involved. However, the result was completely worth all the work.
Like any good crafter or designer, my supply closet had become one of those messes that we just don’t talk about. Even though it was one of those things that should be ignored, I couldn’t stop fussing over the mess. I wanted a central location to store everything neatly, not to mention stored so beautifully that I would marvel every day in my little workspace. This meant it was time to hit the drawing board.
I knew what I wanted, and of course, no one has what I want because I can’t dream up anything simple. Let’s face it, the beautiful things are never that easy to find. The goals were as follows:
Lots and lots and lots of storage. Ideally enough to hold multiple fabric bins of yarn and fabric.
Doors to conceal all the items so that I could store practically, not decoratively. With the amount of small items to store and bulky bins, there was no way this could be open shelving.
I loved the look of lockers, so I came up with an idea to use the concept of lockers, but with a modern, luxurious flair. I started with a normal cube organizer; perfect cubby size, lots of shelves, relatively compact, great starting point. Then, I expanded the organizer. Give the dreaded plastic veneer a coat of paint, make it matte, add cabinet doors, add legs, add style. What does that come out to? A black and gold cabinet with eight shelves just waiting to house all my supplies.
So let’s back this up a bit.
How did I really do this transformation. Well I did each of those steps I mentioned, but it took time and detail. The first task was to get the cube organizer and assemble it. Once ready, I used Zinsser primer to prep the surface in order to get the paint to stick to the veneer. I used Valspar interior paint in a flat finish in the darkest shade of black that I could find. Why did I use this paint? Great question! First, I don’t like glossy finishes; I wanted a matte finish. Also, chalk paint picks up fingerprints way too easy, not to mention other scuff marks. Lastly, I like to be able to pick the color of paint, and to have a large enough supply to cover the area I needed. The result of this was a wall paint mixed to the shade of my choosing, in a durable scuff-resistant formula, made in a matte formula.
After three coats of paint, I gave it two coats of water-based, ultra-matte polycrylic to seal and protect. Finally the organizer was ready; the perfect canvas for all the details about to be added. The real work was just about to begin.
Leg Day
What’s the simplest way to spice up a furniture’s appearance? Give it some gorgeous legs. I found gorgeous wood-turned legs at Lowe’s for about $2 each. I wanted them to be short since there was already a good height to the organizer. I was pretty excited about the look of them as well, absolutely beautiful. Each of the six legs got a healthy coating from the gold spray paint that would be used to paint all thewood and metal accents. For quality purposes, all the hardware also received a spritz, too. The devil is in the details.
One leg on each corner, two legs in the middle to better distribute the weight , and this cabinet had legs prepared for anything the world would throw at her.
Doors of Opportunity
In case I hadn’t already put enough work on my plate, I thought I would add ‘build cabinet doors’ to my agenda. The work sounded simple, and it was fairly straightforward; that doesn’t mean it didn’t take plenty of time.
I lucked out and found a sheet of plywood that was the perfect thickness and measured out all eight doors with only inches of scraps left over. Once the doors were trimmed to size, they were in critical need of sandpaper. I am pretty sure I just got a splinter simply by remembering the state they were in.
Now smoothed to perfection, the doors were ready to be painted and sealed. This left the final steps of preparing and installing the hardware. I found the perfect cabinet pulls and spray painted them gold. Collected all the door hinges and painted them as well. Once all the hardware was installed and the doors were on, the cabinet was ready for business.
I am more than pleased with how this makeover turned out. I don’t think anyone would ever come over and guess that this was once one of those cube organizers. The cabinet looks very elegant and luxurious. Now, I think I am ready to team up with my supply cabinet for my next project!


